Working with models
Editor basics
Every model editor in DomoModeler is built the same way, so what you learn in one applies to the rest. Document editors (ADR, Glossary, Architecture Document) share the same header but replace the canvas with a document.
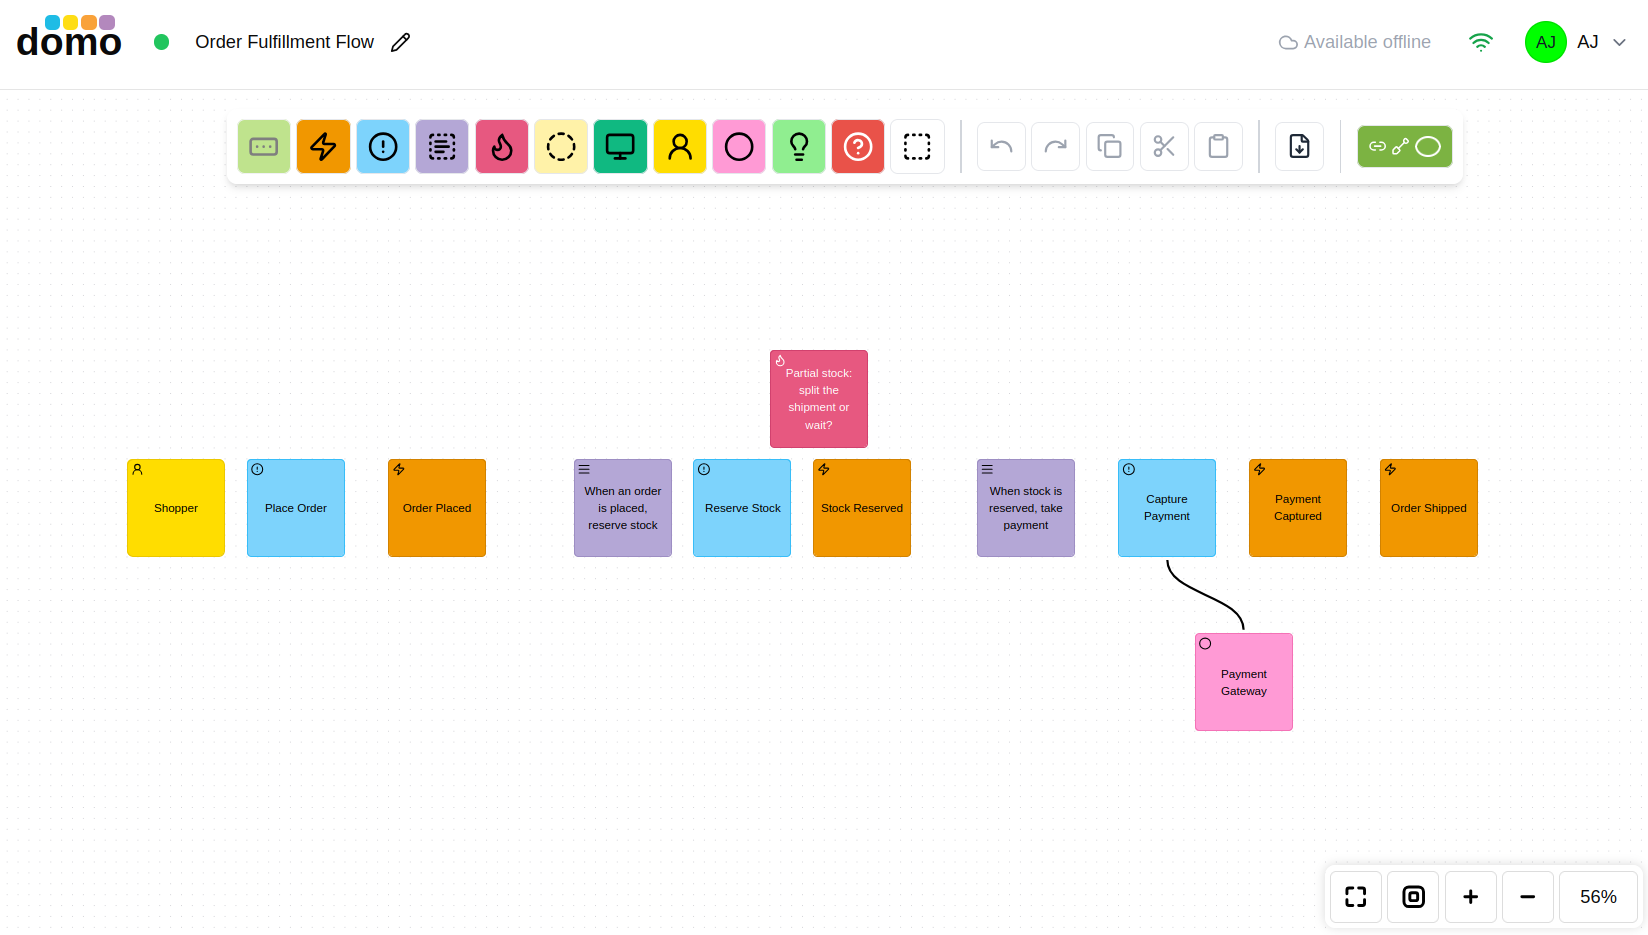
The model header
Running across the top of every editor:
- The domo logo, which takes you back to the dashboard.
- A colored save dot: green when everything is saved, amber while a save is in flight, red if a save failed. Hover it for the exact status.
- The model name. Click it (or the pencil) to rename, if you are an owner, an admin, or the model's creator.
- A View only pill when you cannot edit. See Sharing and access.
- The Available offline toggle for this model.
- The collaboration indicator, showing who else is in the model right now.
- Your avatar, which opens the user menu (Profile, Settings, Docs, Sign out).
The toolbar
The toolbar floats over the canvas. Its left half holds the element buttons for that model type. Each button is colored the way its element is drawn on the canvas, and its tooltip names the element and its keyboard shortcut. Buttons marked with a caret open a small dropdown of related elements.
The right half is the same everywhere:
| Button | Shortcut |
|---|---|
| Undo | Ctrl + Z |
| Redo | Ctrl + Y |
| Copy | Ctrl + C |
| Cut | Ctrl + X |
| Paste | Ctrl + V |
| Export | None |
Export downloads the model. It is a paid-plan capability, and it also requires edit access to the model, so it is disabled (with an explanatory tooltip) when either is missing.
Some editors add extra buttons to the right of that group, such as a link to a related model or a sync review. Those are described on each model type's page.
Adding elements
There are three ways to add an element:
- Click a toolbar button. The element appears on the canvas just below the toolbar.
- Press its shortcut key. The element appears at the mouse pointer, which is usually faster once you know the letters. See Keyboard shortcuts.
- Drag it from the toolbar onto the spot you want it. See below.
Shortcut keys only fire when you are not typing: any text field or rich-text area swallows them first, so
pressing e while writing a description types an e rather than dropping a Domain Event on the canvas.
Dragging an element into place
Instead of clicking a toolbar button and then dragging the element to where you wanted it, you can drag straight from the button and drop it on the canvas. The element lands centered on the cursor, so what you point at is where it appears.
Dragging is an addition, not a replacement: every toolbar button still works by click, and every keyboard shortcut still works, so nothing you already do changes.
These editors support it:
| Editor | Drag from |
|---|---|
| EventStorming | The toolbar, including the elements inside its dropdowns |
| Context Map | The toolbar |
| Domain Model | The toolbar, including the elements inside its dropdowns |
| Architecture: Flow | The palette on the left |
| Architecture: Cloud | The palette on the left |
| Architecture: C4 | The toolbar |
| UI Mockups | The widget palette on the left |
Two editors deliberately leave it out, because their elements are not placed by pointing at a spot:
- Hexagonal / Ports & Adapters places Ports, Adapters and Users on a side of the hexagon; the side decides where the element goes, so there is no free position to drop onto.
- Mind Map and Impact Map grow from a parent node rather than from a point on the canvas.
The same reasoning applies to two individual elements: a Context Map's Bubble Context attaches to a selected Big Ball of Mud, and an EventStorming Swimlane spans the model rather than sitting anywhere, so neither is draggable while the rest of its toolbar is.
Naming, moving, and connecting
- Rename: double-click an element and type. Press
Enterto accept,Escapeto cancel. - Move: drag it. Drag onto a container (a subdomain, a module, an aggregate) to put it inside.
- Select: click,
Shift-drag a box around several, orCtrl+Afor all. - Connect: drag from the handle on one element's edge to another element. What the connection means depends on the model type; on a Context Map it is a relationship you then classify.
- Delete: select and press
DeleteorBackspace.
Element properties
To open an element's properties, select it and press Enter, click its properties icon, or choose
Properties… from its context menu. Most model types share one properties dialog with:
- Name: the same text shown on the element.
- Purpose: a sentence or two of plain prose describing the purpose of this element.
- Definition: a more detailed description of what the element does and how.
- Specifications: a richer markdown text for source code fragments, rules, examples, acceptance criteria, and other details that do not belong on the face of a sticky note.
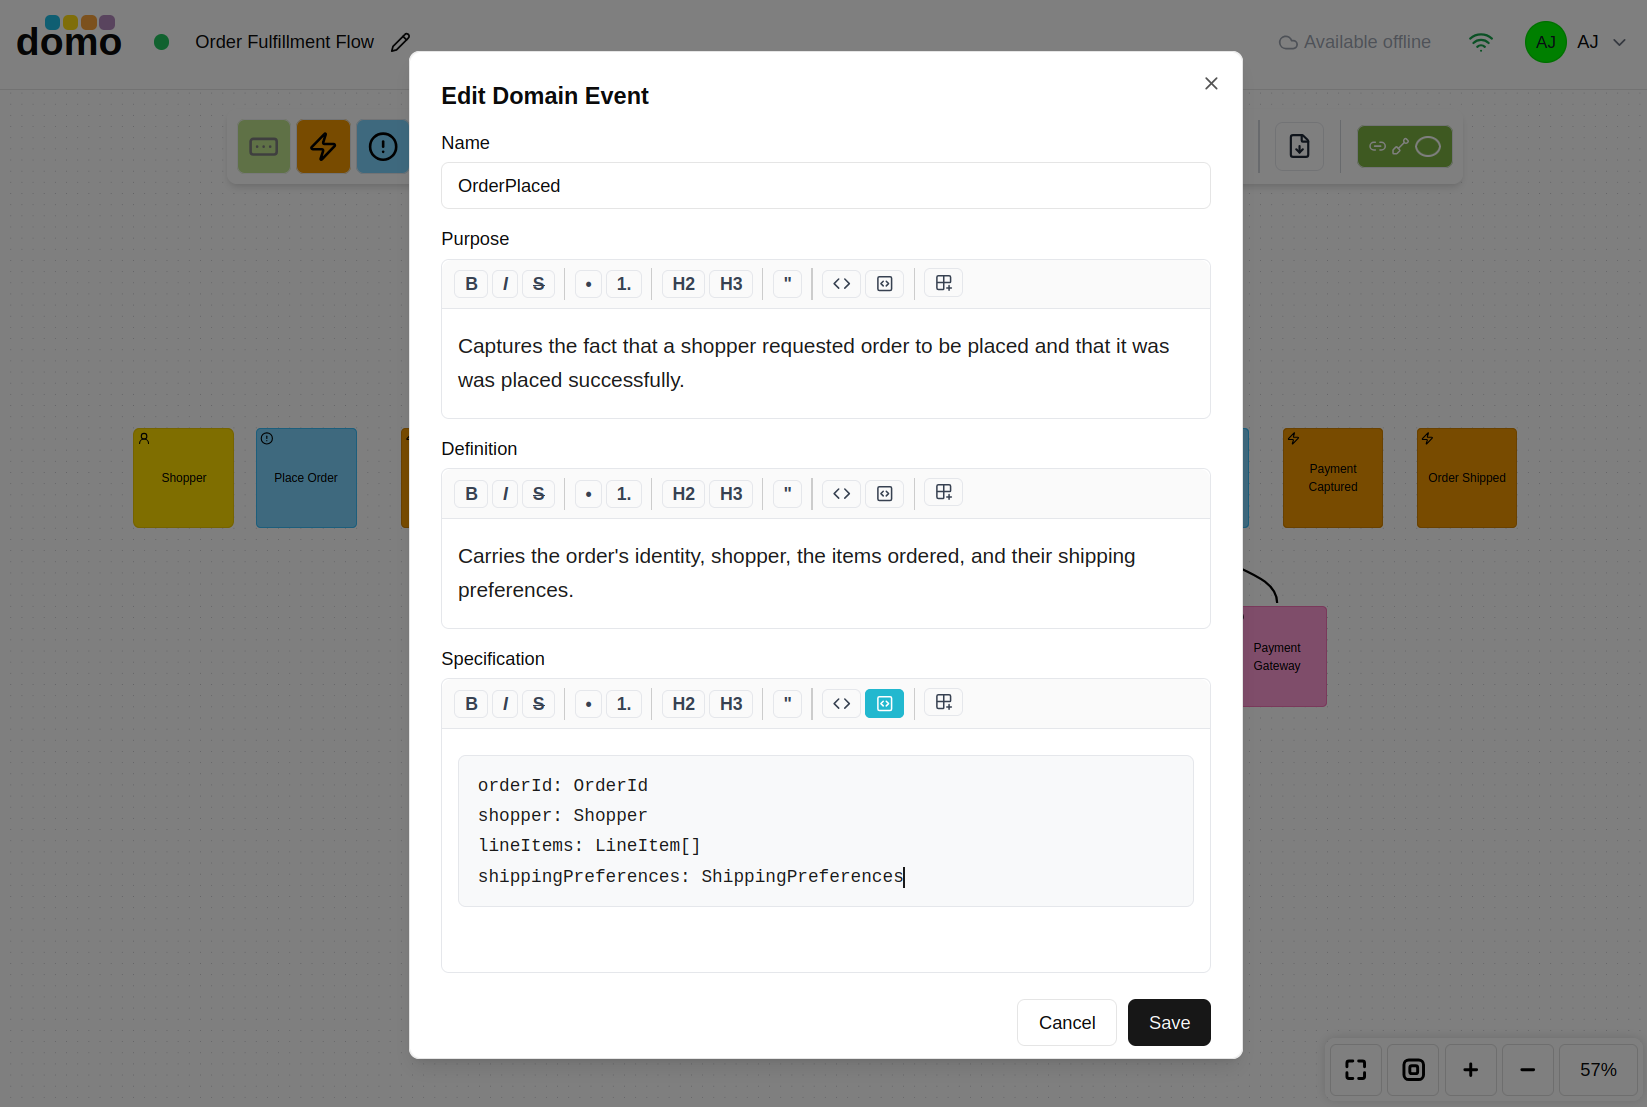
Context Map, C4, and Hexagonal elements have their own dialog boxes suited to what those elements are.
Writing field declarations in Specifications
If a Published Language in this Domain syncs from your model, it reads Specifications for the fields of the schema it creates. Domo CodeUp! will also use the same declarations. Write them in a fenced code block and they are copied into the schema definition. Write nothing and the schema still gets created, correctly named and categorized, but with an empty body for you to fill in later.
The usual way is to list the fields on their own. DomoModeler wraps them in the right declaration for you, using the element's name and its DDD or non-DDD-specific pattern type (Command, Query, User Interface, ...):
Emitted once payment clears.

```
string orderId
timestamp occurredOn
int quantity = 1
```
A Domain Event named OrderPlaced then produces:
event OrderPlaced {
  string orderId
  timestamp occurredOn
  int quantity = 1
}
You can also write the whole declaration yourself, which is useful when you want it to read exactly one way:
```
event OrderPlaced {
  string orderId
  data.Customer buyer
}
```
Either field syntax works, and although not recommended, you can mix them:
string orderId
orderId : string
The point is that the blend of declaration syntax does not confuse DomoModeler tools, but it's best to chose a style and stick with it for the sake of clarity to human users. Also note that if you change a declaration style using the example same types and field names, it is not flagged as a version change. The changes are treated as equivalent at the schema level.
The follow describes a few additional functionalities worth knowing:
- The language tag is optional: You can use the
```domotag as a hint to human users, but a plain```marker is interpreted the same way to our intelligent specifications readers. - Tag anything that is not a declaration: A
jsonsample or abashcommand costs you nothing if you tag the code block, and DomoModeler ignores it. An untagged block is assumed to be aimed at the model, because that is what a code block in a modeling tool usually is. - The first block that reads correctly wins: If you write an example above your declarations, the declarations are still found.
- Prose between declarations is fine: Explain each field as you go. Anything that reads as a sentence is treated as a comment and skipped, and the declarations around it still come across.
- Several blocks are fine too: Fields are collected from every block in the text, so you can write one field per block with prose in between if that reads better.
- A bad line does not cost you the good ones: If any declaration has a typo (syntax error), the rest that are error-free are still copied from the specification to the schema definition, and the bad one is reported by name, quoting the line and the reason. As with any error in code, you can remedy the error and sync again.
Prose between declarations reads as a comment, so this works and produces both fields:
The order on which this happened:

```
string orderId
```

When it happened:

```
timestamp occurredOn
```
And if one declaration has a typo:
```
string orderId
notAType broken
```
the schema still gets orderId, and the sync tells you: "In the model, "notAType broken" could not be read ... 1 other field was read."
Nothing here changes your model. These declarations are read when a Published Language syncs from it, and they are yours to write, correct when flagged as an error, or to leave out entirely.
Tidying up
With several elements selected:
| Key | Action |
|---|---|
^ |
Align tops |
< |
Distribute horizontally |
> |
Distribute horizontally, reversed |
Right-click
Right-clicking the canvas or an element opens a context menu with the actions that apply where you clicked: add an element at that spot, open properties, duplicate, delete, and model-specific extras. Right-drag pans the canvas; the mouse wheel zooms.